
Yesterday VMware vRealize Automation 8.0 became available for download. In this article i will cover the installation process of vRA8 and in next ones i will cover configuration and some more tips and tricks.
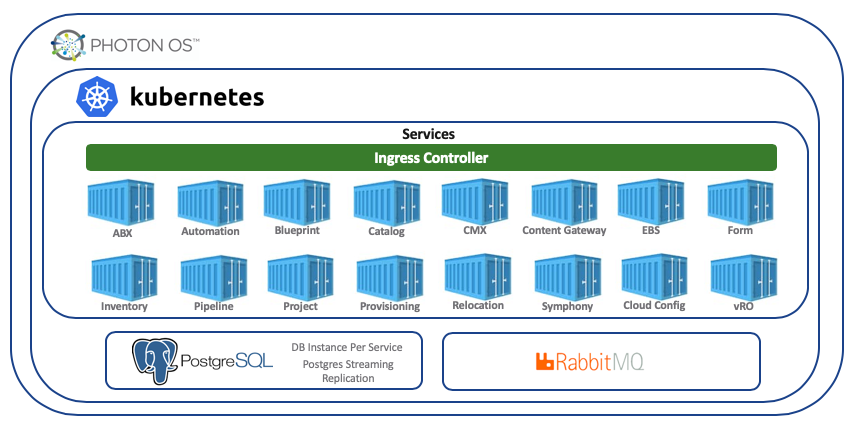
vRealize Automation architecture is very different from the previous versions. Finally, we got rid of Windows IaaS servers and everything is now containerized. See the architecture below:
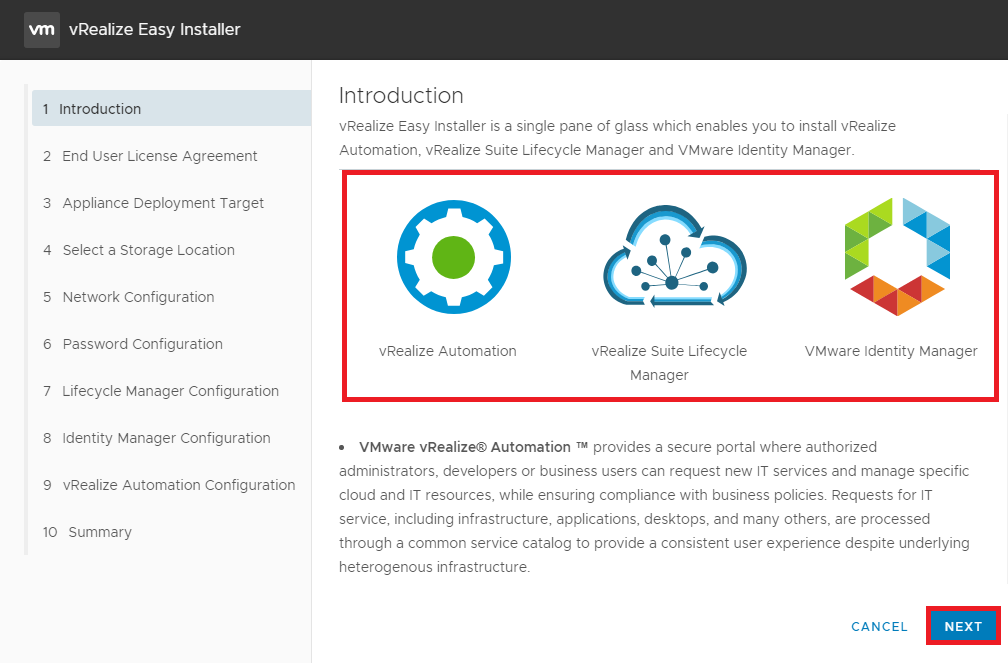
For deploying vRA8 you need to have LifeCycle Manager and also Identity Manager as they are now external services. But if you download the ISO image from my.vmware.com you will get the “easy installer” which includes all of those 3 products.
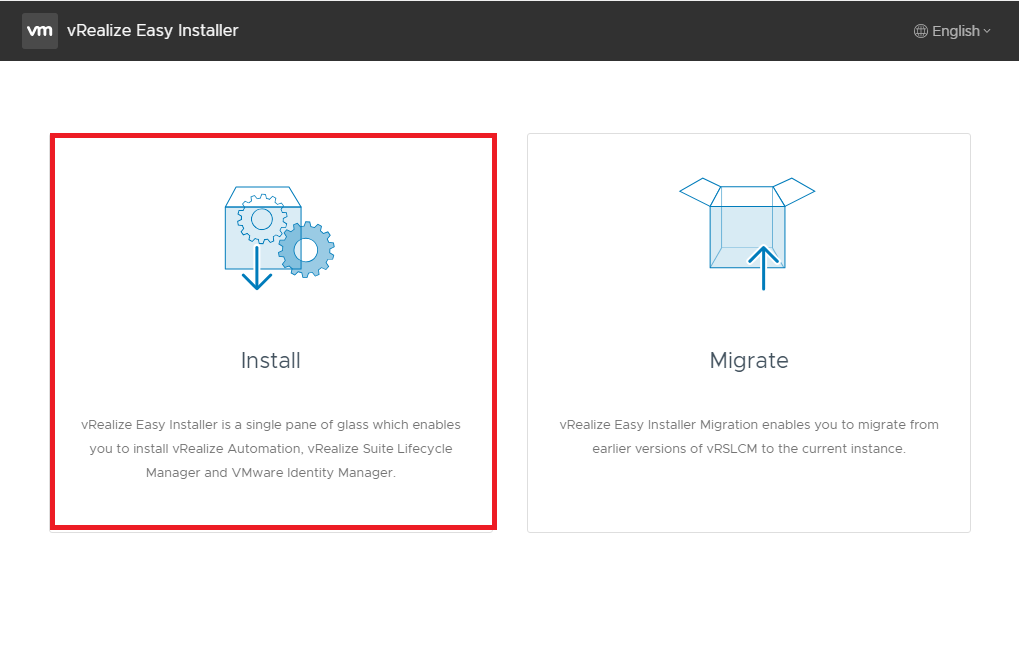
When you start the easy installer you can either choose Install or Migrate:
In the introduction you can read about 3 products which are gonna be installed
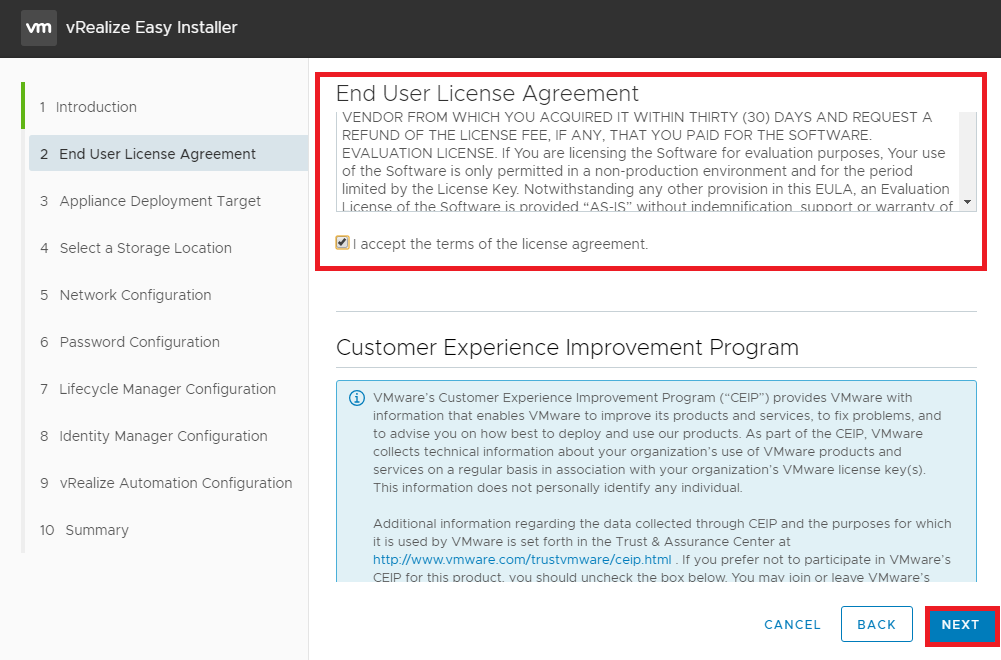
Read and sign EULA.
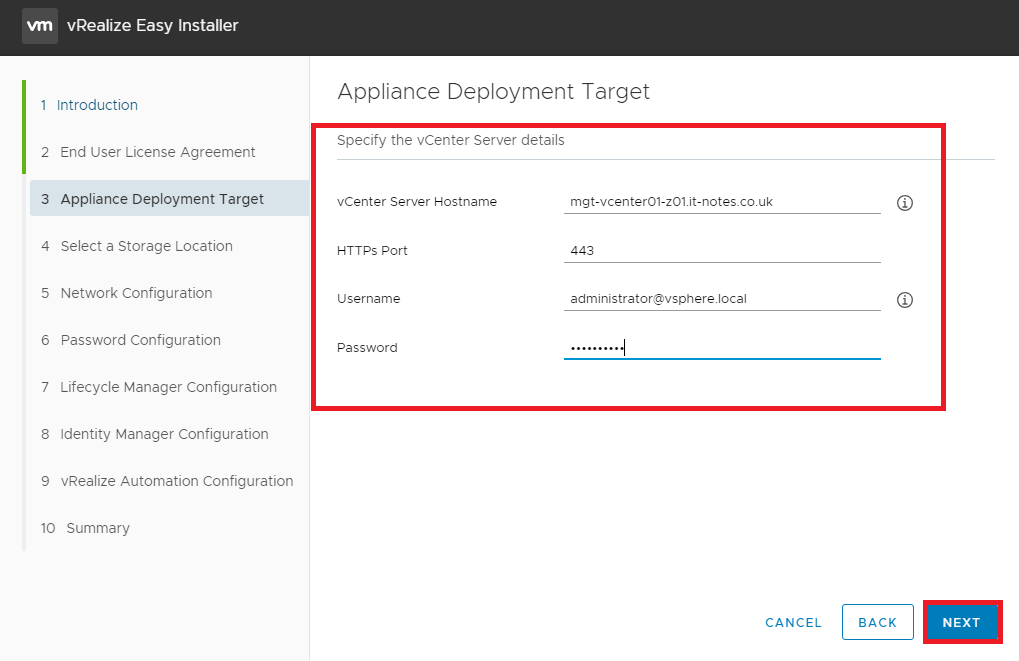
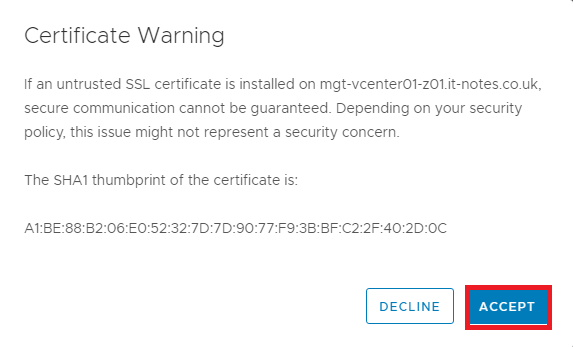
Provide the path to vCenter and credentials. Accept the Certificate.
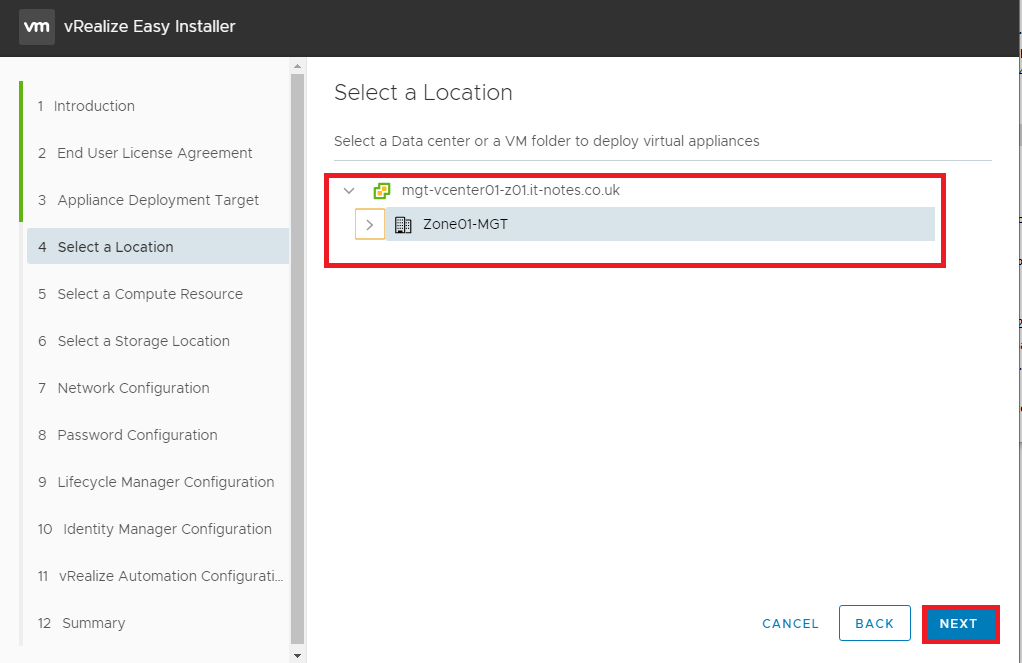
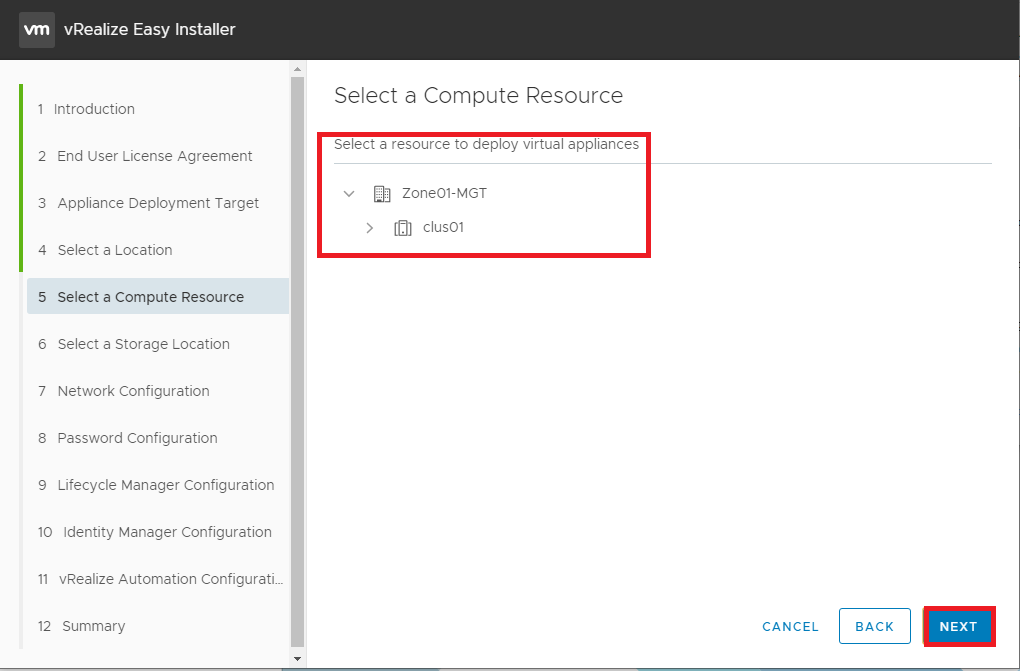
Choose the Location, Cluster and Datastore

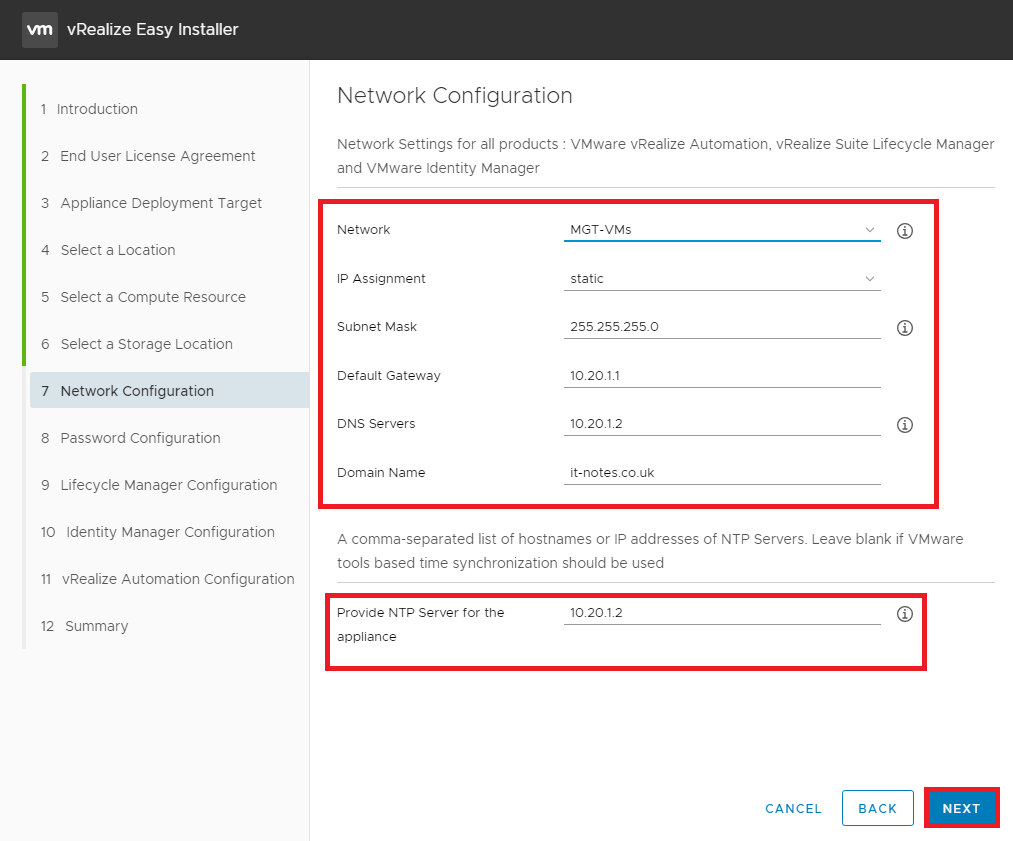
Type in the network configuration for all of 3 appliances
Set the root passwords

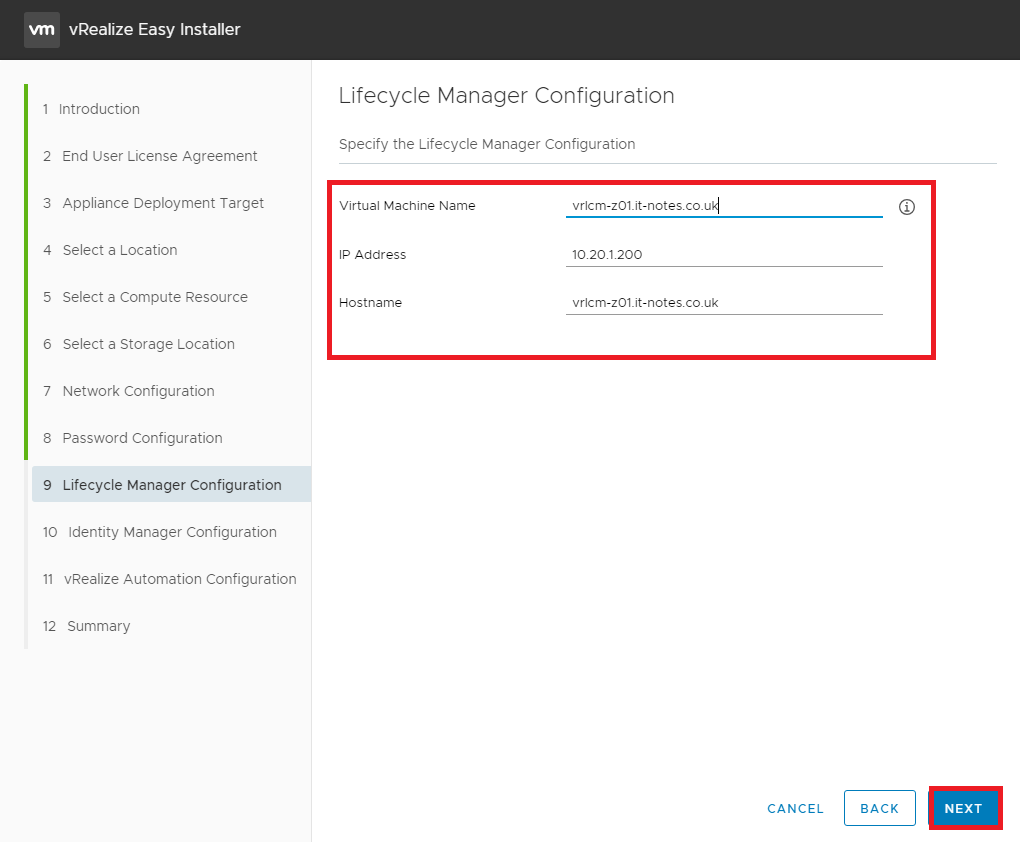
Set the Configuration for LifeCycle Manager
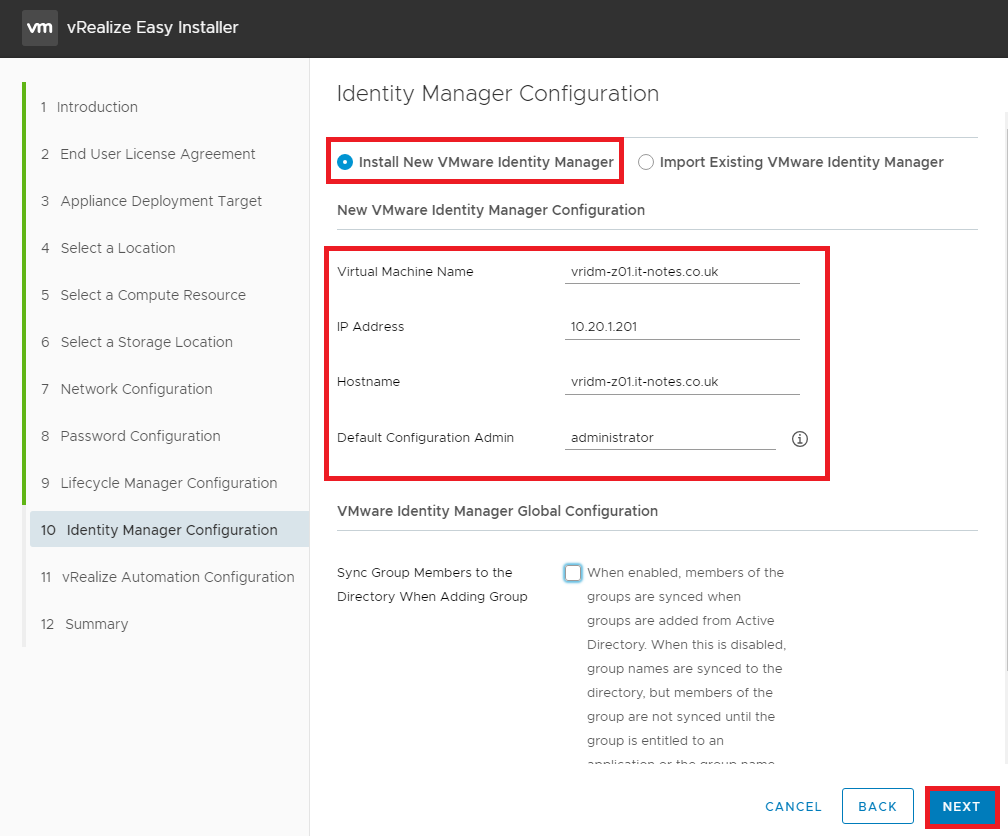
Set the configuration for Identity Manager
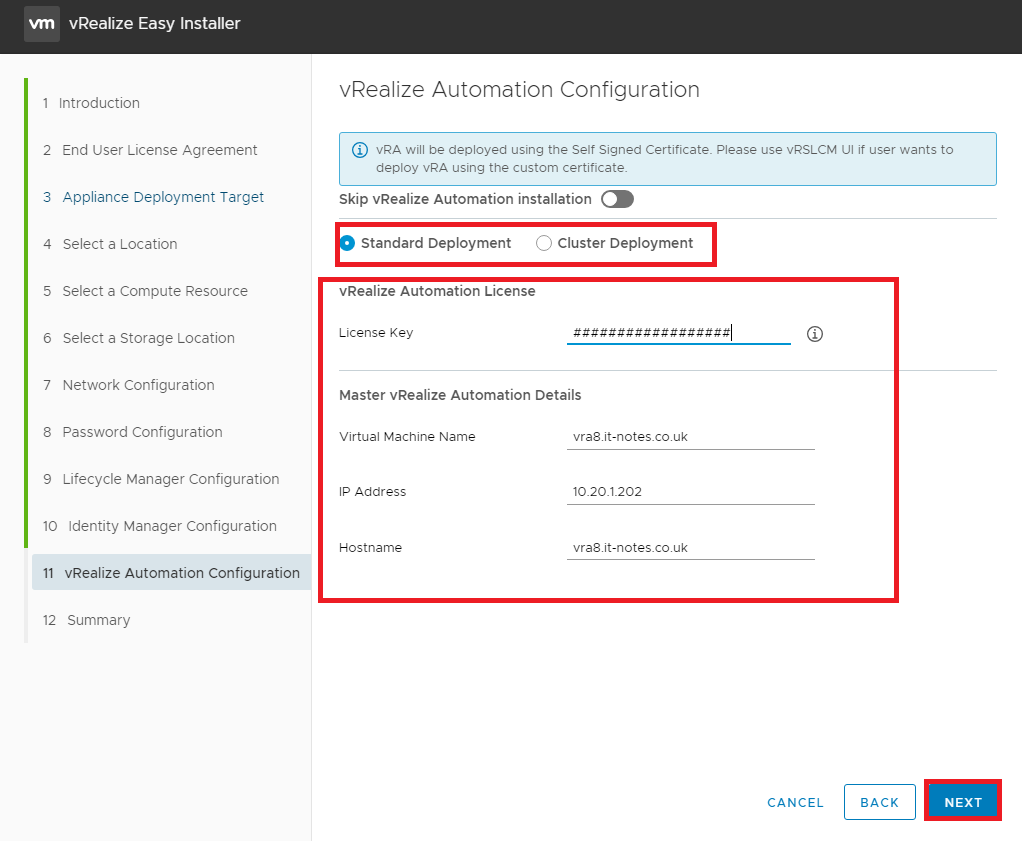
Set the Configuration for vRealize Automation
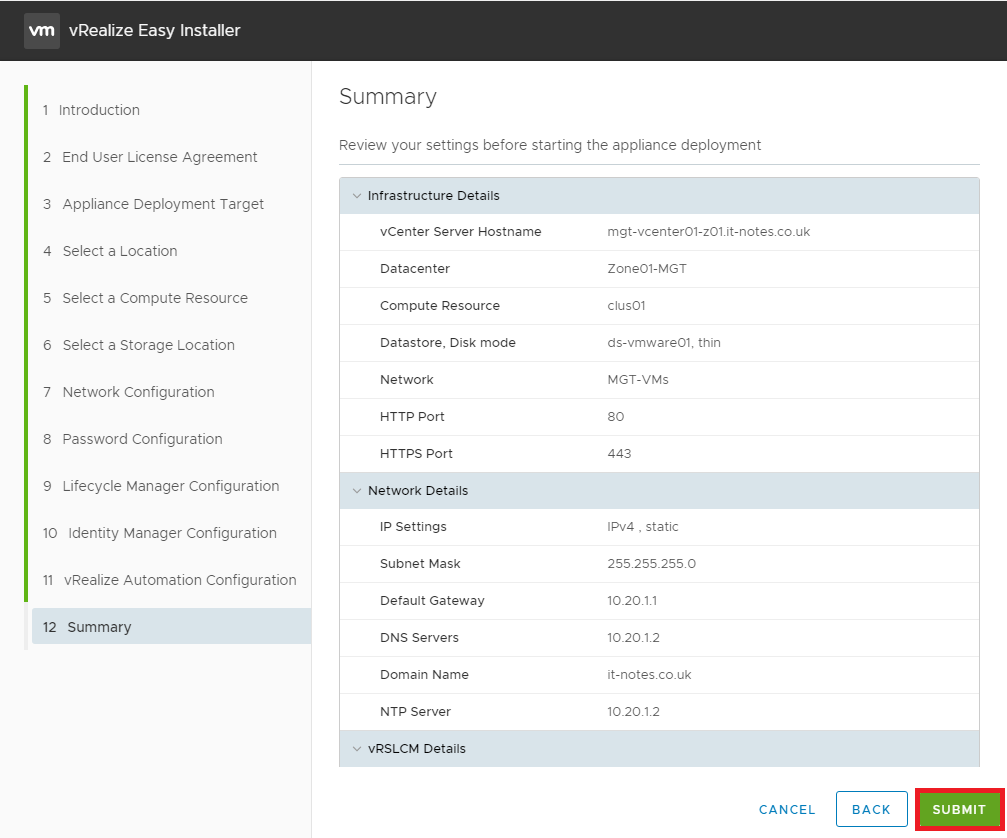
Press submit to start the installation after you verified everything is correct
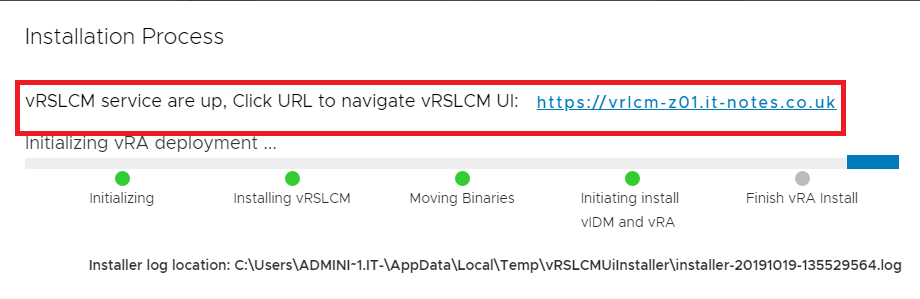
After LifeCycle manager is deployed you can follow the link and see the progress of vRealize Automation and Identity Manager installation
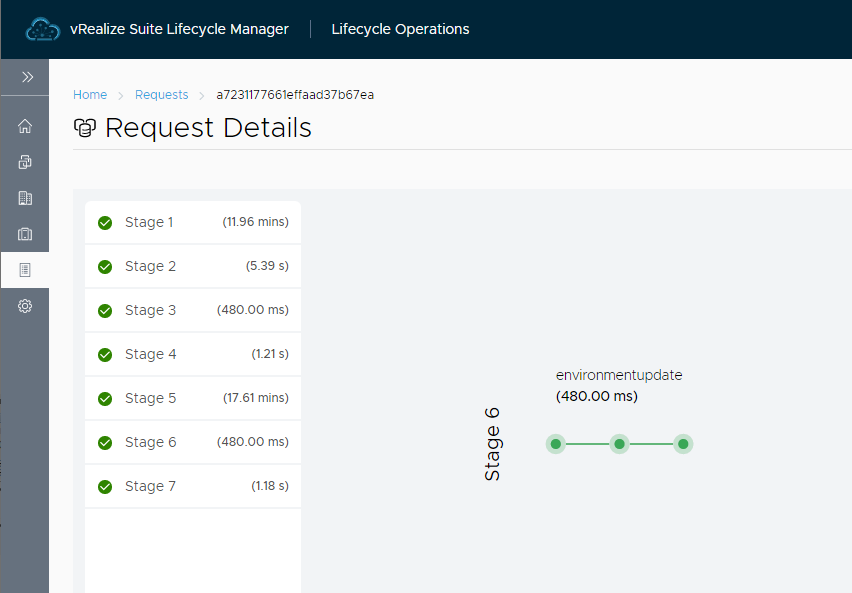
You will see Environments in Progress. If you click it you will see the status of installation

In here installation of vRA was complete in around 30 minutes.
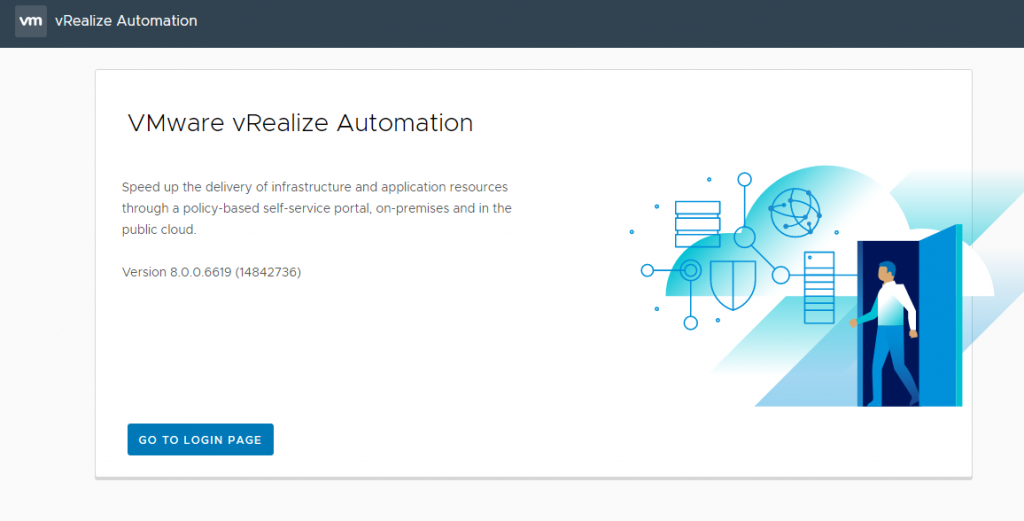
Follow the link to your new vRA environment and go to login page.
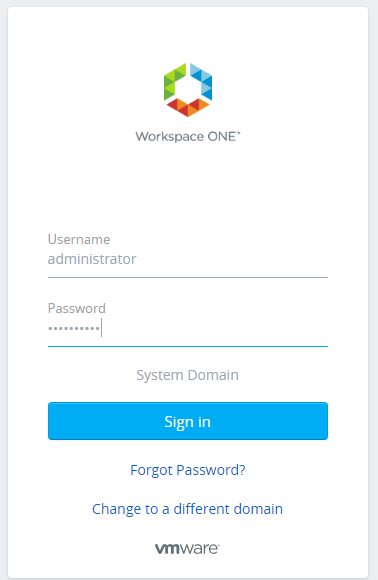
Identity manager will open use your credentials you configured earlier.
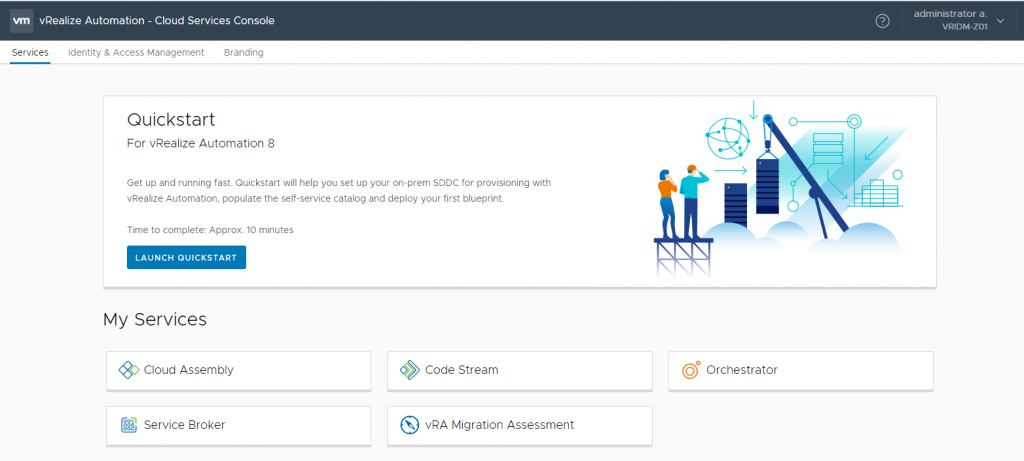
And we have our vRA 8.0 running
In next articles i will cover the further steps with vRA 8.
Thank you for reading.
Leave a Reply